

Creating Organization Enrollment Codes

An Organization Code allows students to instantly self-enroll in your lessons and/or be organized into a Classroom.
Hit this Quick Click pop-up to see how it works...
Quick Help: Create an Organization Code
Your Organization(s) are listed below. If you have already created any Classrooms, they will be listed underneath your main organization.
Click here to create a New Classroom that you can then invite or enroll students into using your new Code.
Creating a New Code:
Click here to download these instructions as a PDF.
-
- Click on the name of the Classroom (below) that you want to create a code for. The background will turn green. Make sure this is the correct Classroom!
- Then click on the tab that says "Organization Code".
- Then click on the button that says "Create New Organization Code".
- Enter a unique code into the "CODE" box.
- Choose the "VALID FROM" and "VALID TILL" dates. The Code will only work during these dates.
- Validation Rules allow you to limit who can redeem your Code. If your school/company email addresses all end in the same domain (ie. austinpowers@hamiltonschools.org), enter hamiltonschools.org in the box that says DOMAIN NAME. No one outside your institution will be able to use the Code.
- Click the SUBMIT button.
You can edit your Organization Codes at any time.
*Please Review This Minor Pre-Caution About Using Organization Codes
Quick Help: Edit an Organization Code
Your Organization(s) are listed below. Beneath each organization is a list of any Classrooms that you have created. Your Codes will be listed under the specific Classroom that they were created for.
Editing an Existing Code:
Click here to download these instructions as a PDF.
-
- Click on the name of the Classroom that the Code was created for.
- Then click on the tab that says "Organization Code".
- To temporarily turn the Code OFF, click the "Code Status" button so that the blue dot is on the left side of the slider.
- To turn the code ON, click the "Code Status" button so the blue dot is on the right side of the slider.
- IMPORTANT!: Click the "Edit" button and ensure that the VALID FROM and VALID TILL dates will still cover the time period that you intend to keep the Code active for.
- To Edit the Dates of the Code, click the "Edit" button.
- To Delete the code, click the "Delete" button.
Distributing Organization Enrollment Codes

Organization codes are awesome, and they make life super easy for everybody. (1) Create a classroom. (2) Decide who to serve and what courses to offer. (3) Create an Organization Code and get it out to your stakeholders.

It takes less than 15 seconds for a student to create a FREE account on our site. They enter your code on their profile and they are instantly enrolled and organized into your classroom.
Using Group Codes is so easy, that you might have to be a little careful, particularly if you have a smaller license.
People do troll the internet for Group Codes and they might use some of your licensed seats if you get careless. If this is a concern, we can help.
If your target audience is from the same Organization, such as a school, you can easily set the Code so that no-one from an outside organization can redeem it. You can also set dates for the code to automatically turn on and off. And generally, if you plan on leaving a code active for a long time, try not to post it in places where it might "live-forever".
*We cannot refund your account or reimburse you for seats that were claimed by an unintended recipient of your Group Code.
Please Login to view this page

You can create unlimited Group Codes, and each one can be assigned to a different staff member, who can then individually manage and analyze the students in their respective Campaign/Classroom. Your organization administrator will always have full access to all student records at all time, and will be able to specifically segregate each Campaign/Classroom as it's own cohort when needed.
As you're already envisioning, this gives you ENDLESS VERSATILITY. You can use Group Codes to organize students into respective Campaigns/Classrooms, by having each student enter the code for their teacher's classroom. You can use Group Codes to separate Student's from Parents, or you can use Group Codes to differentiate between your organization's efforts. For example, you can use one Group Code to track the conversion rate of your Email Campaign, while another tracks your Social Media success. Or maybe one code measures the interest of one course topic against another, one geographic segment against another, or one age-group against another. The data can be invaluable!
Your Group Codes can grow with you and your organization. At the end of this year, you can easily delete the Campaigns/Classrooms associated with this year's efforts. Then simply issue new codes to reorganize your students, or explore other ways of easily organizing your students through our student management options.
IMPORTANT: Each Group Code will pull "Seats/User Registrations" from your main licensing agreement, so budget carefully. You are not charged for seats that are not used, and no single student profile will ever cost you more than one seat from your cumulative license; regardless of how many Group Codes they use. But each campaign will temporarily occupy a quota of seats from your license, until you modify the seat allotment of that Campaign, or until you delete that Campaign.
ALSO NOTE: When you create a Group Code, you can easily restrict its use to students using the email address of your school or company's domain (ie. HillcrestSchools.Org). This blocks anyone else from using it. If you do not use this Validation Rule option, you'll need to be careful about turning your code On and Off, because anyone who gets a hold of it, can redeem it for access under your license and use one of your seats.
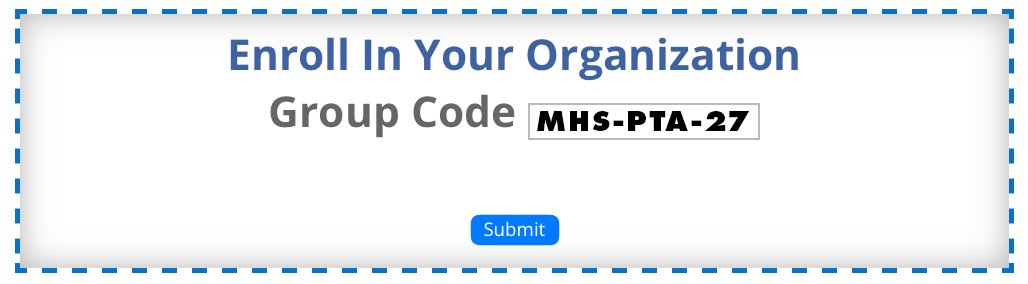
Using Organization Codes

(Example Code: "MHS-PTA-2027")
When you offer a prospective student one of your Organization Codes, you give them the ability to register and begin taking your courses in less than 15 seconds flat; and it's completely FREE for them.
As soon as they use your code, that student will instantly be:
-
- Registered With Your Organization
- Organized Into Their Campaign / Classroom
- Enrolled In Your Courses
- Displayed On Your Student Analytics Dashboard
Organization Codes provide you with ENLESS VERSATILITY. You can create an unlimited number of codes and use them in very powerful ways. You can turn them on, turn them off, set limits on who can use them, set dates for auto-expiration and much more.
It's All So Easy!
Your students simply enter the code into the box on their profile page, and everything happens instantly. Students can redeem an unlimited number of Organization Codes. So the same student can use one code to be instantly organized into the "Class of 2027" macro student group, and use a second code to also be organized into the "Health One: 3rd Period" group. They will now be organized with the "Class of 2027" cohort, but can be managed and monitored on a classroom level by the teacher or guidance counselor of "Health One: 3rd Period". At the end of the year, the student can easily be removed from the "Health One; 3rd Period" group and reassigned to a new teacher. All their student records go with them, and they stay attached to the "Class of 2027" macro student group.
In another example, an Organization may choose to create temporary groups based upon class, club or team assignments, and run a contest for course completion. It becomes easy to compare the group's analytics and reward the winner. Another organization may simply use one Organization Code for an "Email Campaign", and another Organization Code for a "Social Media Campaign". They can then compare which effort resulted in a higher conversion rate. Or they can conduct the same comparison to determine what courses stimulate more interest in their community. By simply creating one Organization Code for the "Safer Social Media Course" and another Organization Code for the "Vaping Prevention Course", they can easily determine which topic is more relevant right now.
Using Codes as Gatekeepers:
When you create an Organization Code, you can easily restrict its use to students or staff using the email address of your school or company's domain (ie. HillcrestSchools.Org). This blocks anyone else from using it. So if you distribute a code that you've limited to students or staff using your school's email accounts, no one without a school email account can redeem the code. This prevents unauthorized sharing of your licensed "Seats".
One Caution About Codes:
Remember, (1) you can set limits on the number of students who can redeem each code. (2) You can also turn codes on or off, and (3) you can set dates for the auto-expiration of codes. As mentioned above, (4) you can also prevent codes from being redeemed by staff or students who don't use your school's email address. And finally, (5) you can distribute your codes in ways that do not live forever on the internet (Email, Flyer, Slide at Back to School Night etc.)
Just remember, each redemption of an Organization Code by a NEW STUDENT will pull a "Seat / User Registration" from your main licensing agreement. This cannot be undone. People do search the internet for Organization Codes and some of your community members will share the codes that you publicize. We cannot refund or replace "Seats" that are redeemed by students outside of your intended reach. If your organization has licensed a tightly limited number of "Seats", be careful with your codes.
THE POWER OF CAMPAIGNS

A campaign is simply an organizational tool that you will use to differentiate between different groups of students, or different types of community efforts. You will always have access to macro-level reports that include ALL of the student activity in your organization. But most organizations find it useful to also differentiate between groups of students, or types of educational outreach efforts.
For example, a school may want to assign certain students to a teacher or guidance counselor who will be primarily responsible for managing that group of students. Using Campaigns/classrooms, that teacher will be able to segregate their students, manage them and run mico-level reports on just that cohort.
A community organization that offers wellness courses to their stakeholders, may need to know what courses generate more interest, what groups are more engaged, what advertisement methods produce higher conversion rates, or other invaluable insights into the preferences and behaviors of the people they serve. Using Campaigns, your organization can compile invaluable data on your community and maximize the effectiveness of your efforts.
If you DO NOT need to segment your students and you WILL NOT be comparing the results of multiple educational campaigns, you DO NOT need to create any campaigns. An example of this set-up would be a family or small group that is merely here to educate itself. If that describes you, just keep it simple and move directly on to "Enrolling Students."
So, whether or not you choose to use campaigns, you will always be able to run macro-level reports on your cumulative student body and on your group's cumulative efforts. You will also be able run highly detailed reports on individual students. Using campaigns simply gives you the additional ability to run mid-level reports on smaller groups of students, or on individual community efforts. See below for some examples on how our clients are using Campaigns.
BASIC SCHOOL CAMPAIGNS
Some schools will offer different courses to their STUDENTS, STAFF & PARENTS. They usually choose to separate these groups into at least three separate Campaigns/classrooms, so they can offer different classes and run different reports with these different groups.
BIGGER SCHOOL CAMPAIGNS
Some schools also choose to segment students by class year, or by their GUIDANCE COUNSELOR, or by their health class TEACHER. That way a different staff member can be assigned to manage different courses, to different groups of students, at different times.
Using campaigns, each group can be managed separately, and their teacher can easily run reports on just their group(s) of students. You can create an unlimited number of campaigns/classrooms and use them any way you wish.
COMMUNITY ORGANIZATION
Analytics are the lifeblood of community organizations. They help you understand your stakeholders and better meet their needs.
Your "campaigns" help you A/B test different outreach methods. Offer different courses to the same group, or offer the same course in different ways; or maybe at different times. Try incentives, run competitions, explore different partnerships or reach out to different groups. Campaigns help you measure the outcomes of everything!
You can Add, Edit and Delete Campaigns at any time. You can also change your mind and reconfigure your Campaigns at any time. When you delete a Campaign, you do not delete the student or their data, so you can reconstitute your Campaigns later, and re-run reports that are limited to the new cohorts. You can also update or reconstitute your Campaigns each year, as Freshmen, move on to their Sophomore year or as students switch teachers.
One Minor Caution
For Groups With Smaller Licenses:
Organization Codes are awesome! We use them to easily enroll and organize our students. When an EXISTING STUDENT uses an enrollment code to move into a new Campaign / Classroom, they do not use any of your "Seats/User Registrations". This is because they are already enrolled in your Organization.
Just remember, each redemption of an Organization Code by a NEW STUDENT will pull a "Seat / User Registration" from your main licensing agreement, because it creates a new student profile. This cannot be undone or refunded. People do search the internet for Organization Codes and some of your community members will share the Codes that you publicize. We cannot refund or replace "Seats" that are redeemed by students outside of your intended reach. If your organization has budgeted for a tightly limited number of "Seats", be very careful with your Codes. The following precautions will help you prevent inadvertent enrollments:
If you are predominantly using Codes inside of a school or organization where all students have the same email domain (ie. austinpowers@hamiltonschools.com), we recommend that you select "Validation Rules" when creating your Codes. You can also (1) turn codes on or off so they are only valid for brief windows, and you can (2) set dates for the auto-expiration of codes, so you don't forget to delete them. Lastly you can (3) distribute your codes in ways that do not live forever on the internet (Email, Flyer, Slide at Back to School Night etc.).
If you are a small organization with a small license, and these precautions are not enough, we recommend that you Invite, Enroll and Organize your students in other ways. Click here to explore other ways of managing your students.